Stucco isn’t delicate.
Whether applied as exterior siding or as a finish for interior walls, the age-old material requires little in the way of ongoing maintenance.
Occasional cleaning or patching may be necessary, but with the right combination of products and tools, any homeowner can get the job done. Here’s how.

Over the course of millennia, builders have used everything from animal horns to whiskey in the making of stucco—an attractive, durable plaster finish suitable for both interior walls and exterior siding.
Today, the material typically consists of more familiar ingredients like cement and sand, but it remains as tough as ever, often lasting as long as 50 or 80 years. However, in order to live out its expected lifespan successfully, stucco tends to require a modest amount of care and attention. How much largely depends on the nature of the application. Indoor stucco may call for nothing more than a new paint job now and again. But with exposure to the beating summer sun, the howling winds of winter, and simply the dirt and dust kicked up by passing traffic, it’s only a matter of time before stucco siding needs minor repair or, at the very least, a simple cleaning. For many homeowners, stucco maintenance starts and ends with a close look at the surface or surfaces in question. If your inspection reveals a reason to go a step further, read on for advice on ensuring your stucco looks and performs its best.
CLEANING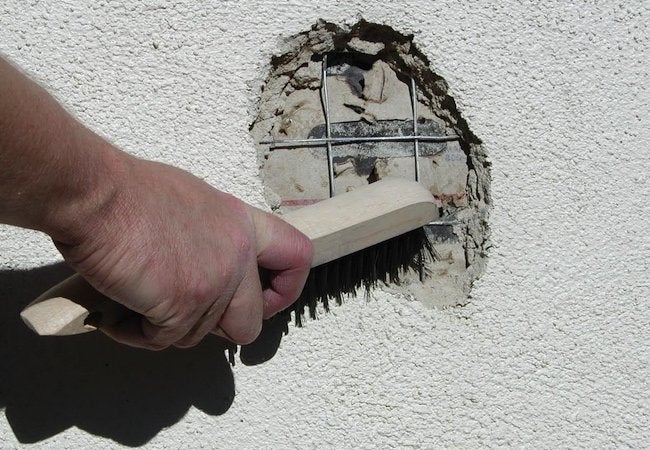
Photo: ctscement.com
A porous material, stucco collects dirt and absorbs stains, even indoors.
The good news is that cleaning indoor stucco usually takes nothing more than water and a bit of elbow grease. Simply scrub the dingy stucco with a dampened nylon brush to saturate the surface, then rub away the buildup with a moistened microfiber cloth (or clean cotton rag). In extreme cases—for instance, with deeply set stains—you may find that you need more firepower. Experts recommend, not a conventional household cleaner, but a chemical solution known as trisodium phosphate, or TSP. Though it’s commonly available at home centers and hardware stores, be advised that in order to use TSP safely, homeowners must take the proper precautions. Ventilate the area by opening windows and running a fan, and when working, wear the right gear (rubber gloves, protective eyewear, and long-sleeve clothing). Once it’s safe to proceed, combine the TSP with water in a bucket, diluting to a water-to-TSP ratio of 15 to 1. Finally, apply the TSP to the affected area by means of a nylon brush and allow the stucco an hour or two to dry.
In outdoor applications, when used as a siding material or even a garden wall finish, stucco tends to get a lot dirtier and for that reason, requires more frequent cleaning. The process doesn’t take long, though, so long as you use either a garden hose (equipped with a spray nozzle) or a power washer (on its lowest setting). First, with your chosen tool set to spray in a mist formation, saturate the stucco from bottom to top. Next, switch to a more concentrated spray and proceeded to clean, not from bottom to top, but from top to bottom (that way, dirt higher up on the wall doesn’t simply settle at the base). After spraying, check the stucco for any lingering buildup and, if you encounter any buildup, dislodge it with a stiff-bristle brush. Just be careful not to scrub so vigorously that you grind down the stucco. Now, if blemishes still remain on the siding, there’s one more step. With a pump sprayer or a hose wand with a built-in soap reservoir, apply diluted TSP (described above) directly to the affected areas. Then, having allowed sufficient time for the stucco to dry, finish up by rinsing the stucco surface one last time.
REPAIR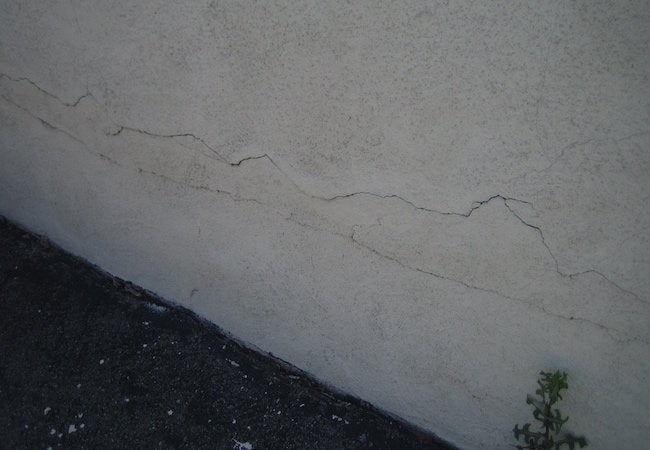
Photo: ctscement.com
Why does stucco last so long?
In part, its durability owes to the fact that unlike other, more flexible materials, stucco boasts the gift of rigidity. That said, the rigidity of the material can also be a curse, causing it to develop cracks, chips, and gouges over time. Inside the home, surface stucco imperfections are merely an eyesore. But on the exterior, gaps in stucco siding can lead not only to further degradation of the stucco, but also to a host of nasty issues— mold growth, for example, or pest infestations. Don’t give a minor crack the chance to become a major headache. Take swift action. On your own, without having to hire a contractor, you can restore both the outward appearance of your stucco and, in the case of siding, its ability to defend your home against the elements. Modest stucco repairs are easily within reach for do-it-yourselfers because of products like Rapid Set Stucco Patch. On the one hand, Stucco Patch simplifies the crack-filling process, and on the other, speeds it up. In fact, due to its unique formulation, you get the job done in remarkably little time.
To begin, clear any loose or crumbling material away from and out of the crack, whether simply by using your hands or by employing a wire brush. At the same time, remember to eliminate any chalk, dirt, or oil that would inhibit the ability of the repair compound to adhere properly. Next, if the crack you’re addressing isn’t already at least a quarter of an inch thick, use a cold chisel and a hammer to widen it that much (and if possible, chisel the crack so that its edges are perpendicular to the wall). At this point, it’s worth taking a moment to assess the ambient conditions where you’re working. If it’s especially hot (or if you’re outdoors, especially windy), take the time to pre-moisten the stucco surrounding the crack. Otherwise, assuming you’ve prepared the stucco surface, you can proceed directly to preparing the Rapid Set Stucco Patch. In a wheelbarrow, mixing tub, or bucket, combine Stucco Patch with water in a 4-to-1 ratio and, with a drill-mounted paddle, mix the material for a few minutes until you have achieved a smooth, uniform, lump-free consistency like peanut butter.
Now you’re ready to apply the Rapid Set Stucco Patch.
Working with a putty knife or small trowel, press the material firmly into the crack. Then, after completely filling the crack, run a flat board over the area. Doing so ensures that the patch doesn’t protrude beyond the plane of the existing stucco. What happens next depends on the texture of the existing stucco—and, depending on the size and location of the patch, if you deem it necessary for the patch to feature the same texture. Of course, if the existing surface features a smooth finish, then no problem—you can smooth the patch to an equally smooth finish with a traditional plastering tool. If, however, you need to match a decorative effect like stippling, then you may wish to take a cue from the pros who often employ ad hoc tools like sponges and kitchen whisks to create the desired effect. Once you have finished the patch to your satisfaction, you can more or less call it a day. There’s no complicated curing process involved with Rapid Set Stucco Patch.
Rapid Set Stucco Patch sets on its own, and a lot more quickly than other similar products.
But that’s not the best part.
When you repair stucco with other materials, you have to wait as long as 28 days before being able to paint over the patch. That’s 28 days before you can cross the project off your to-do list. Meanwhile, true to its name, Rapid Set Stucco Patch is ready to receive paint only 90 minutes after application. That’s why both pros and homeowners favor rapid-setting repair materials that give them the ability to move quickly through the process, from the beginning all the way to the end. The emphasis on speed only makes sense given that, after all, many stucco failures are time-sensitive, with prudence favoring a sooner-rather-than-later repair.
Overall, though stucco doesn’t require a great deal of care, you can’t forget all about it. Inspect it periodically—once per season, in the case of stucco siding—and clean or repair the material as necessary. Give stucco the modest amount of attention it demands, and it’s likely to reward you with decades of beauty and weather-tight performance.


